A Comprehensive Guide To Creating Bootable USB Drives For Windows Server Installations
A Comprehensive Guide to Creating Bootable USB Drives for Windows Server Installations
Related Articles: A Comprehensive Guide to Creating Bootable USB Drives for Windows Server Installations
Introduction
With enthusiasm, let’s navigate through the intriguing topic related to A Comprehensive Guide to Creating Bootable USB Drives for Windows Server Installations. Let’s weave interesting information and offer fresh perspectives to the readers.
Table of Content
A Comprehensive Guide to Creating Bootable USB Drives for Windows Server Installations
While Microsoft has not yet released Windows Server 2025, the concept of using a USB drive to install operating systems remains a critical aspect of system administration. This guide will explore the process of creating bootable USB drives for Windows Server installations, focusing on the methods and tools available, and emphasizing the importance of this technique for efficient and streamlined deployments.
Understanding the Importance of Bootable USB Drives
The traditional method of installing Windows Server involved using physical DVDs. However, with the advent of USB technology, creating bootable USB drives has become the preferred method for several reasons:
- Convenience: USB drives are smaller, more portable, and easier to handle than DVDs.
- Speed: USB drives offer faster data transfer speeds compared to DVDs, leading to quicker installation times.
- Reliability: USB drives are more durable and less prone to damage than DVDs.
- Modernity: Many modern systems lack optical drives, making USB drives the only viable option for installation.
Methods for Creating Bootable USB Drives
Several tools and methods can be employed to create bootable USB drives for Windows Server installations. The most common approaches are:
1. Using the Windows USB/DVD Download Tool
This official Microsoft tool is designed specifically for creating bootable USB drives and DVDs from Windows Server ISO files. It provides a simple and user-friendly interface, making it suitable for both beginners and experienced administrators.
Steps to Create a Bootable USB Drive Using the Windows USB/DVD Download Tool:
- Download and install the tool: Obtain the latest version of the Windows USB/DVD Download Tool from the Microsoft website.
- Download the Windows Server ISO file: Obtain the ISO image of the desired Windows Server version from the Microsoft website.
- Launch the tool: Run the downloaded tool and select the "Create a bootable USB drive" option.
- Select the ISO file: Browse to the location of the downloaded Windows Server ISO file and select it.
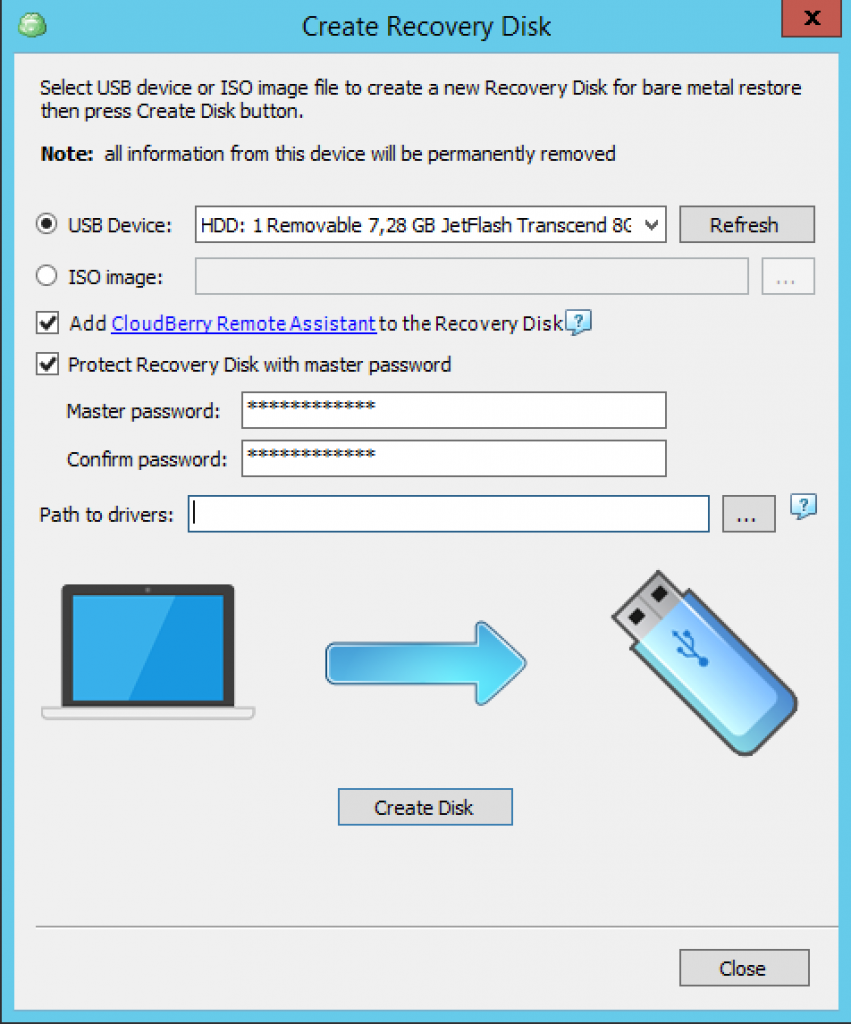
- Choose the USB drive: Select the USB drive you want to use for the installation. Ensure the drive is empty, as the tool will format it.
- Start the process: Click the "Begin copying" button to start the process of creating the bootable USB drive.
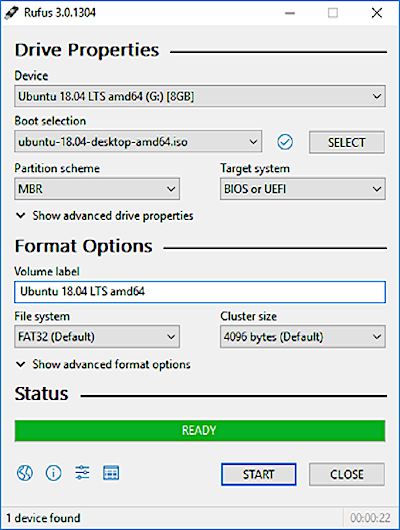
2. Using the Rufus Tool
Rufus is a free and open-source utility designed for creating bootable USB drives. It offers a wide range of customization options and supports various operating systems, including Windows Server.
Steps to Create a Bootable USB Drive Using Rufus:
- Download and run Rufus: Download the latest version of Rufus from the official website and run the executable file.
- Select the USB drive: Choose the USB drive you want to use for the installation.
- Select the ISO file: Browse to the location of the downloaded Windows Server ISO file and select it.
- Choose the boot selection: Ensure the "Create a bootable disk using" option is set to "ISO Image."
- Select the file system: Choose the appropriate file system for the USB drive, typically FAT32 for compatibility with most systems.
- Start the process: Click the "Start" button to begin creating the bootable USB drive.
3. Using Command Prompt (CMD)
For advanced users, the command prompt can be used to create bootable USB drives. This method requires a deeper understanding of command-line syntax and disk partitioning.
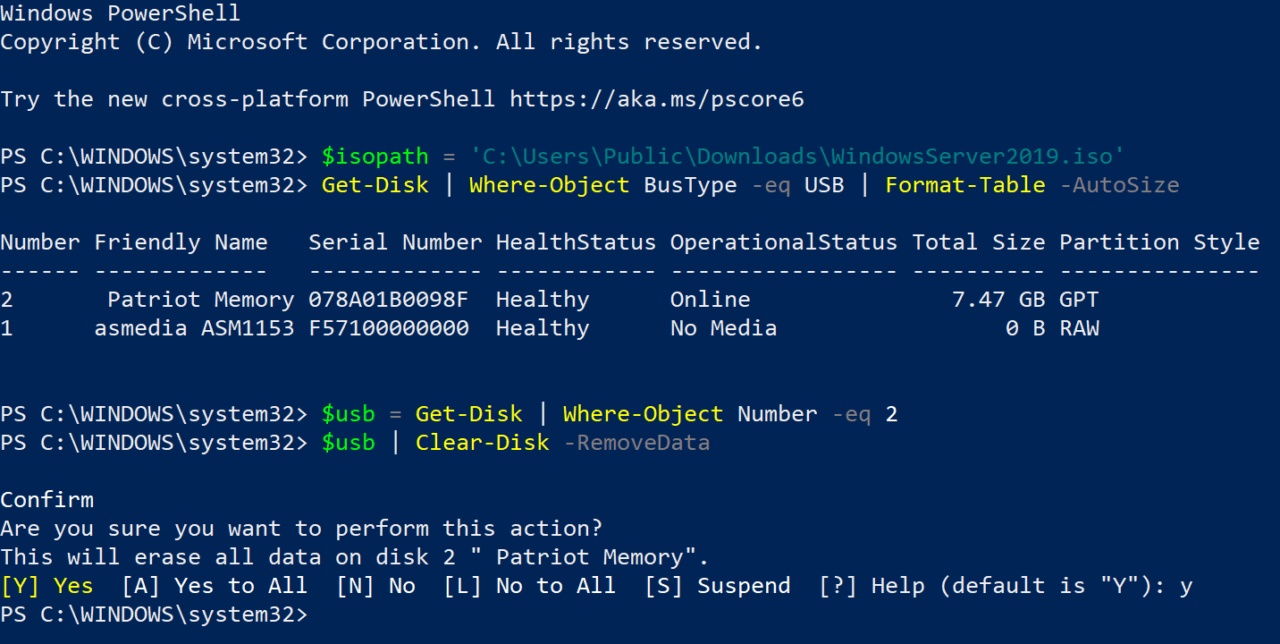
Steps to Create a Bootable USB Drive Using Command Prompt:
- Open Command Prompt as administrator: Search for "cmd" in the Start menu, right-click on the result, and select "Run as administrator."
-
Format the USB drive: Use the
diskpartcommand to format the USB drive. Ensure the drive is empty and select the correct disk number using thelist diskcommand. -
Assign a drive letter: Assign a drive letter to the USB drive using the
assign letter=Xcommand, replacing "X" with the desired letter. -
Copy the ISO files: Use the
copycommand to copy the contents of the ISO file to the USB drive. -
Make the USB drive bootable: Use the
bootsectcommand to make the USB drive bootable. The exact syntax may vary depending on the Windows Server version.
Important Considerations for Creating Bootable USB Drives:
- USB Drive Compatibility: Ensure the USB drive is compatible with the target system and has enough storage space for the Windows Server installation files.
- File System: Use the appropriate file system for the USB drive, typically FAT32 for compatibility with most systems.
- Boot Order: Ensure the system is configured to boot from the USB drive in the BIOS settings.
- Data Backup: Always back up important data before formatting the USB drive, as the process will erase all existing data.
FAQs Regarding Bootable USB Drives for Windows Server Installations
Q: What are the minimum system requirements for installing Windows Server on a USB drive?
A: The minimum system requirements for installing Windows Server vary depending on the specific version. Refer to the official Microsoft documentation for the latest requirements.
Q: Can I use a USB flash drive to install Windows Server on a virtual machine?
A: Yes, you can use a bootable USB drive to install Windows Server on a virtual machine. However, you may need to adjust the virtual machine settings to boot from the USB drive.
Q: Can I use a bootable USB drive to upgrade an existing Windows Server installation?
A: No, a bootable USB drive is typically used for clean installations of Windows Server. For upgrading an existing installation, use the in-place upgrade method.
Q: Can I create a bootable USB drive for Windows Server using a Mac computer?
A: Yes, you can create a bootable USB drive for Windows Server using a Mac computer using tools like TransMac or the Windows USB/DVD Download Tool.
Tips for Creating and Using Bootable USB Drives
- Use a high-quality USB drive: Choose a reliable USB drive with sufficient storage space.
- Verify the ISO file: Ensure the downloaded ISO file is genuine and not corrupted.
- Test the bootable USB drive: After creating the bootable USB drive, test it on a different computer to ensure it boots correctly.
- Keep the bootable USB drive safe: Store the USB drive in a safe place to avoid accidental damage or loss.
Conclusion
Creating bootable USB drives for Windows Server installations is a crucial skill for system administrators. The process is straightforward and can be accomplished using various methods and tools. Understanding the importance of bootable USB drives, the different creation methods, and the associated considerations ensures a smooth and efficient deployment of Windows Server. By following the guidelines outlined in this guide, administrators can effectively create bootable USB drives and leverage their benefits for streamlined server installations.


Closure
Thus, we hope this article has provided valuable insights into A Comprehensive Guide to Creating Bootable USB Drives for Windows Server Installations. We hope you find this article informative and beneficial. See you in our next article!