A Comprehensive Guide To Implementing WebDAV On Windows Server: Enabling Collaborative File Sharing
A Comprehensive Guide to Implementing WebDAV on Windows Server: Enabling Collaborative File Sharing
Related Articles: A Comprehensive Guide to Implementing WebDAV on Windows Server: Enabling Collaborative File Sharing
Introduction
In this auspicious occasion, we are delighted to delve into the intriguing topic related to A Comprehensive Guide to Implementing WebDAV on Windows Server: Enabling Collaborative File Sharing. Let’s weave interesting information and offer fresh perspectives to the readers.
Table of Content
A Comprehensive Guide to Implementing WebDAV on Windows Server: Enabling Collaborative File Sharing
While Windows Server 2025 is not yet a released product, the principles of setting up WebDAV on a Windows Server remain consistent across versions. This guide will comprehensively explore the process of configuring WebDAV on a Windows Server, focusing on its significance in facilitating collaborative file sharing and enhancing data accessibility.
Understanding WebDAV
Web Distributed Authoring and Versioning (WebDAV) is an extension of the Hypertext Transfer Protocol (HTTP) that enables users to edit and manage files on a remote web server as if they were accessing them locally. Essentially, it allows for the creation, deletion, modification, and management of files and folders over the internet using standard web protocols. This makes WebDAV an invaluable tool for:
- Collaborative File Sharing: Teams can work on documents, presentations, and other files simultaneously, regardless of their physical location.
- Remote File Access: Users can access and manage files on a server from any device with an internet connection.
- Centralized Data Management: WebDAV provides a centralized platform for storing and managing files, ensuring consistency and security.
- Version Control: WebDAV supports versioning, allowing users to track changes and revert to previous versions of files.
Prerequisites for WebDAV Implementation
Before configuring WebDAV on your Windows Server, ensure you have the following:
- Windows Server: A Windows Server operating system, such as Windows Server 2019 or 2022.
- IIS (Internet Information Services): IIS is a web server software included in Windows Server, providing the foundation for WebDAV functionality.
- File Share: A designated file share on the server where you want to enable WebDAV access.
Setting Up WebDAV on Windows Server
The following steps outline the process of configuring WebDAV on a Windows Server:
-
Enable IIS: Ensure that IIS is installed and enabled on your server. This can be done through the Server Manager or by using the command prompt.
-
Create a Virtual Directory: Create a virtual directory within IIS that points to the file share you want to make accessible via WebDAV. This virtual directory will be the entry point for WebDAV access.
-
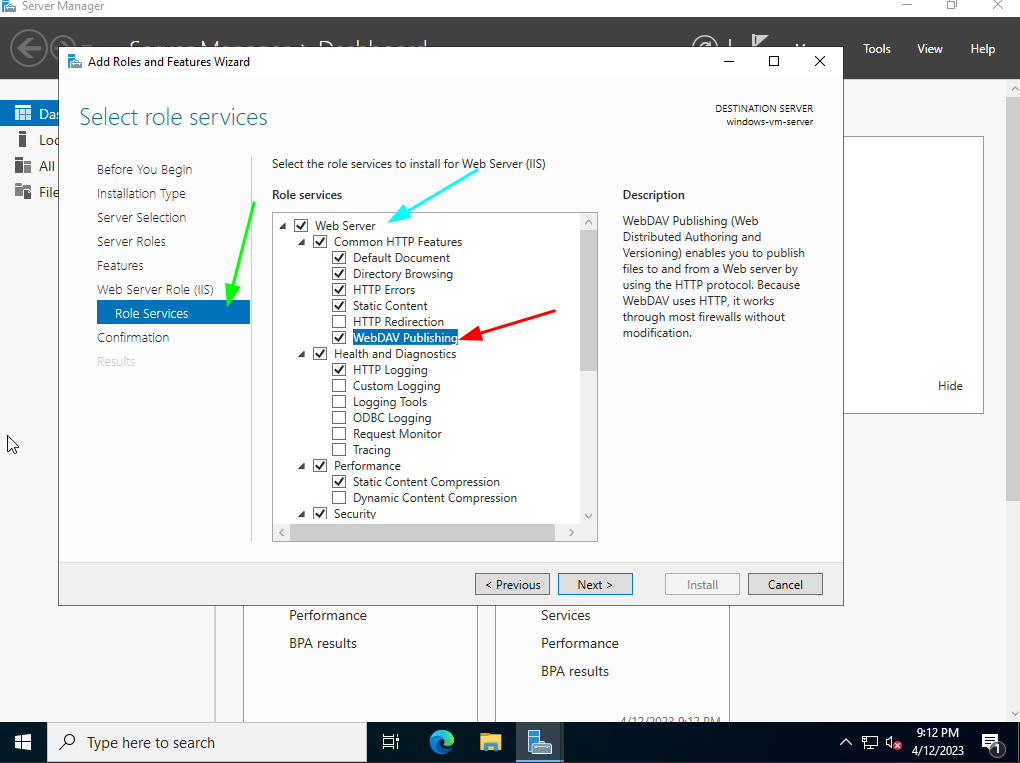
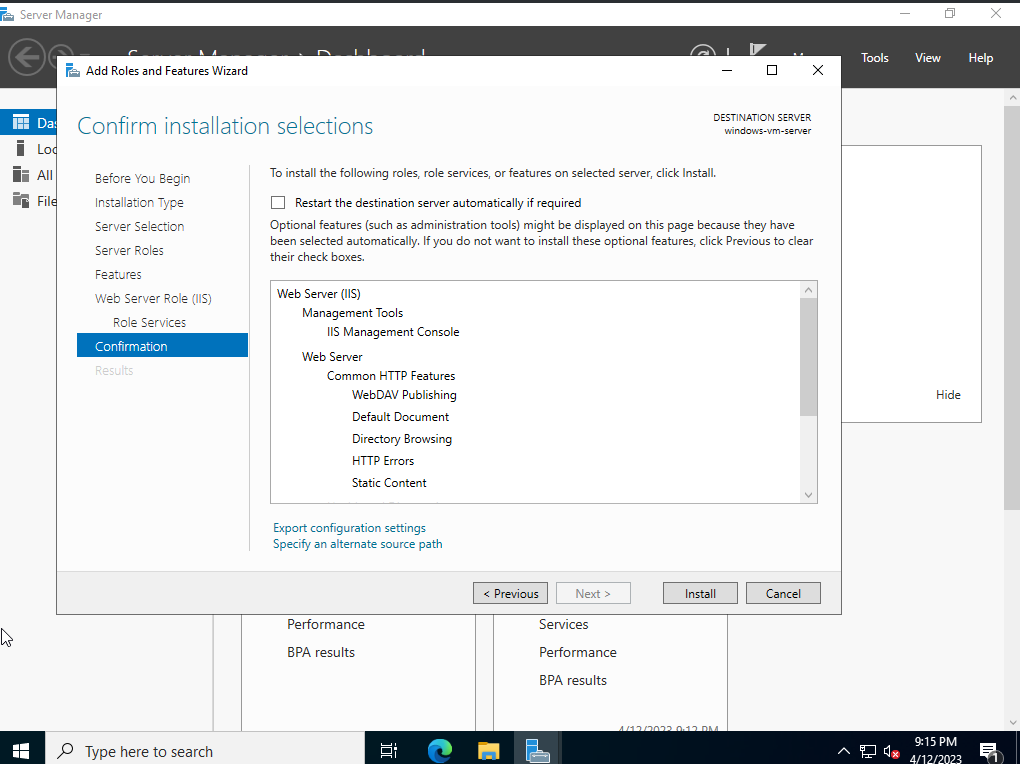
Install WebDAV Module: The WebDAV module is not included by default in IIS. You need to install it using the Server Manager or the command prompt.
-
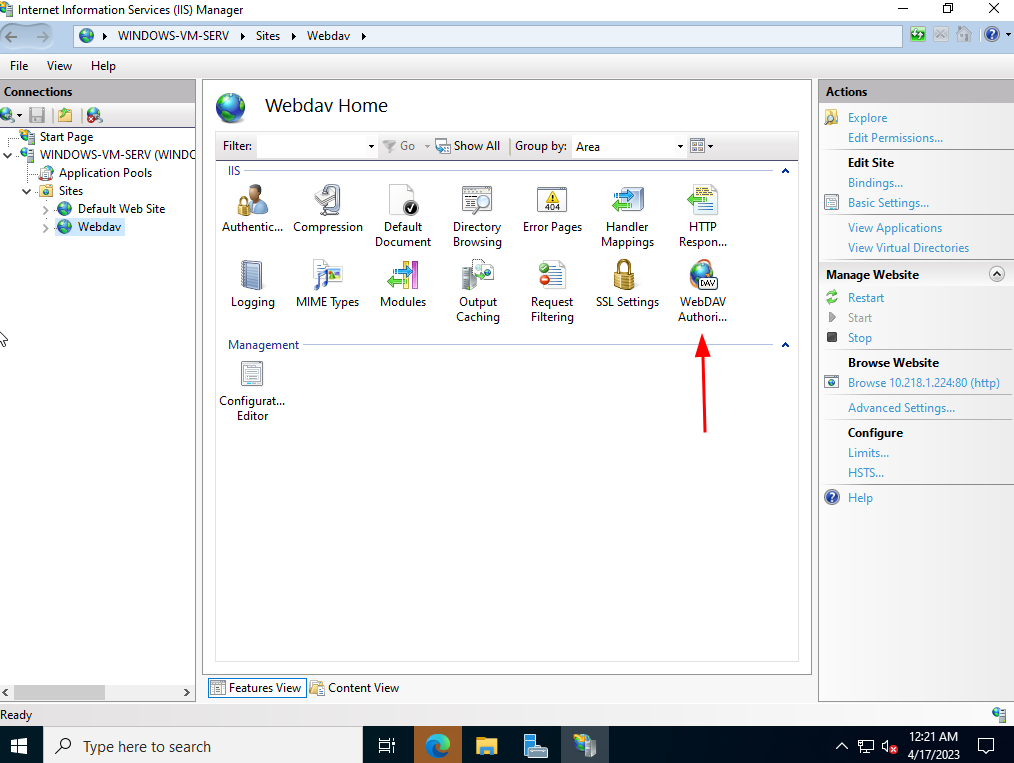
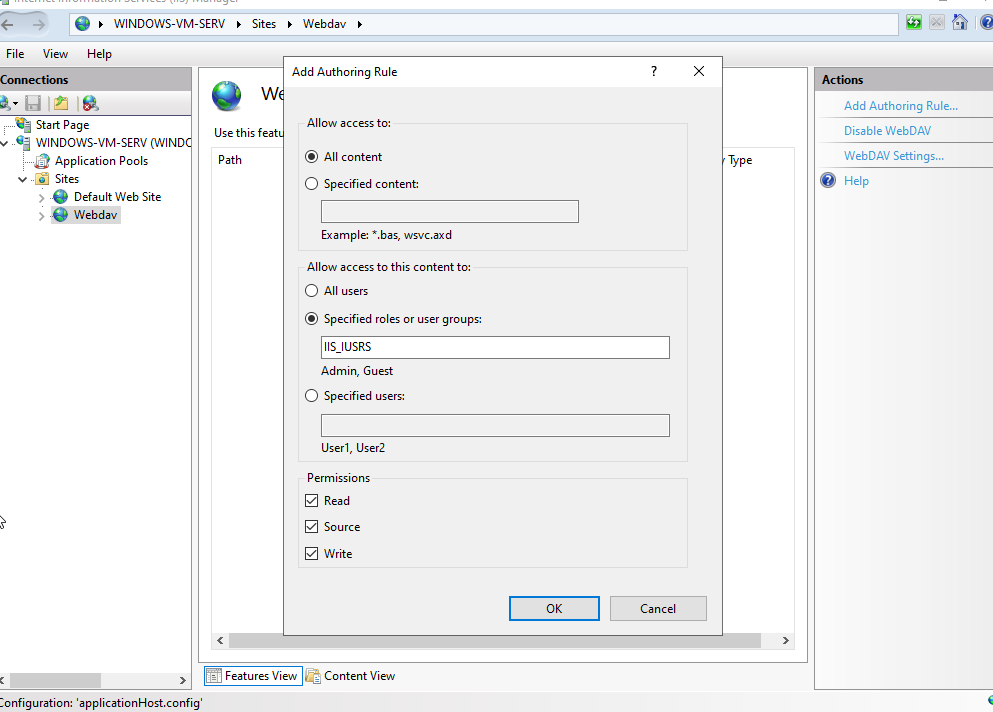
Configure WebDAV Settings: Navigate to the virtual directory you created in IIS and open the "WebDAV" section. Here, you can configure the following settings:
- Enable WebDAV: Select this option to enable WebDAV access for the virtual directory.
- Allow Read Access: Allow users to view and download files from the share.
- Allow Write Access: Allow users to create, modify, and delete files on the share.
- Allow Delete Access: Allow users to delete files and folders from the share.
- Allow Create Access: Allow users to create new files and folders within the share.
- Allow Source Access: Allow users to copy files from the server to their local machines.
- Allow Destination Access: Allow users to copy files from their local machines to the server.
-
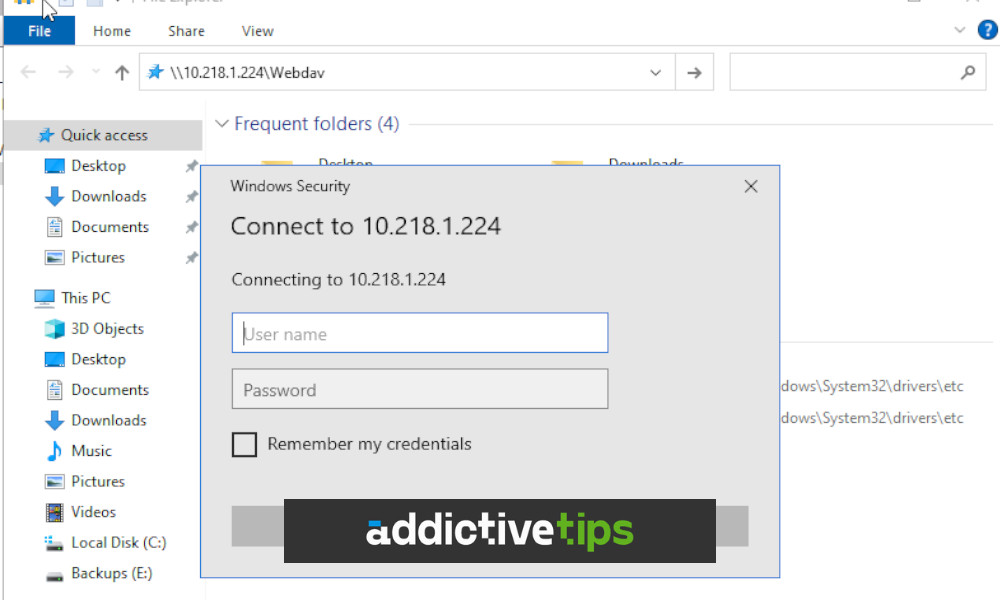
Configure Authentication: WebDAV requires authentication to ensure secure access to the file share. Choose an appropriate authentication method, such as:
- Basic Authentication: Simple username/password authentication.
- Windows Authentication: Uses Active Directory credentials for authentication.
- Digest Authentication: More secure than basic authentication, providing a hash of the password instead of the actual password.
-
Configure Permissions: Set appropriate permissions for the file share and its contents. Ensure that users have the necessary permissions to access and modify files as needed.
-
Test WebDAV Access: After completing the configuration, test WebDAV access using a web browser or a WebDAV client. Ensure that users can access the file share and perform the desired operations.
Security Considerations for WebDAV
While WebDAV offers significant benefits, it’s crucial to implement security measures to protect your data:
- Secure Communication: Use HTTPS to encrypt communication between clients and the server.
- Strong Authentication: Implement robust authentication methods, such as Active Directory integration or multi-factor authentication.
- Access Control: Implement granular access control to restrict user access based on their roles and responsibilities.
- Regular Updates: Keep your server software and WebDAV modules updated to mitigate security vulnerabilities.
- Auditing: Enable auditing to monitor user activity and identify potential security breaches.
Benefits of Implementing WebDAV
Implementing WebDAV on your Windows Server offers several advantages:
- Enhanced Collaboration: WebDAV facilitates seamless file sharing and collaboration among team members, regardless of their location.
- Increased Productivity: Users can access and manage files remotely, improving productivity and efficiency.
- Simplified File Management: WebDAV provides a centralized platform for managing files, reducing administrative overhead.
- Improved Data Security: When implemented correctly, WebDAV can enhance data security through authentication and encryption.
FAQs on WebDAV Implementation
Q: What are the common WebDAV clients available for accessing files on a Windows Server?
A: Several WebDAV clients are available for accessing files on a Windows Server. Some popular options include:
- Windows Explorer: Windows Explorer can access WebDAV shares directly through the "Network" section.
- Filezilla: A popular free FTP client that also supports WebDAV.
- Cyberduck: A cross-platform FTP, SFTP, and WebDAV client.
- Rclone: A command-line utility that supports WebDAV and other cloud storage services.
Q: Can I use WebDAV for syncing files between different devices?
A: While WebDAV doesn’t inherently provide real-time file synchronization, you can use third-party tools that leverage WebDAV for syncing. For example, some cloud storage services like OwnCloud and Nextcloud support WebDAV for syncing files across devices.
Q: How can I troubleshoot WebDAV connectivity issues?
A: Several troubleshooting steps can help resolve WebDAV connectivity issues:
- Check Firewall Settings: Ensure that the firewall on the server and client machines allows communication over the necessary ports (typically port 80 or 443 for HTTPS).
- Verify Virtual Directory Configuration: Ensure that the virtual directory is correctly configured and points to the correct file share.
- Check Authentication Settings: Verify that the authentication method is correctly configured and that users have the appropriate credentials.
- Review Event Logs: Check the event logs on the server for any errors related to WebDAV access.
Q: Is WebDAV a suitable solution for large file transfers?
A: While WebDAV can handle large file transfers, it may not be the most efficient solution for transferring extremely large files. For large file transfers, consider using dedicated file transfer protocols like FTP or SFTP, which are optimized for this purpose.
Tips for Implementing WebDAV
- Plan Carefully: Before implementing WebDAV, carefully plan the file share structure, access control, and authentication methods to ensure a secure and efficient system.
- Use Strong Passwords: Encourage users to use strong passwords for accessing WebDAV shares.
- Monitor User Activity: Regularly monitor user activity on the WebDAV share to identify any suspicious behavior.
- Implement Security Best Practices: Follow security best practices, such as regularly updating software and implementing strong access controls.
Conclusion
WebDAV provides a robust and versatile solution for collaborative file sharing and remote access on Windows Server. By implementing WebDAV, organizations can enhance data accessibility, improve team collaboration, and streamline file management. However, it’s crucial to prioritize security by implementing appropriate authentication methods, access control, and other security measures. With careful planning and a focus on security, WebDAV can be a valuable asset for businesses and individuals alike.


Closure
Thus, we hope this article has provided valuable insights into A Comprehensive Guide to Implementing WebDAV on Windows Server: Enabling Collaborative File Sharing. We hope you find this article informative and beneficial. See you in our next article!